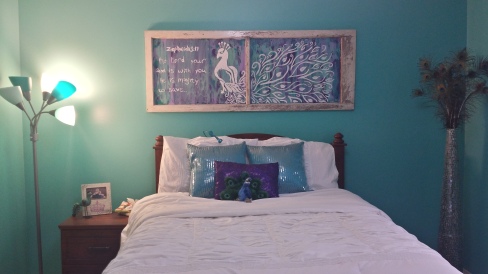
Pretty in Peacock ~ Shiloh’s Room

Shiloh
8 Years: 5 Homes, 5 Rooms
In the eight years my daughter Shiloh has been alive, she has had five bedrooms as a result of our family’s five moves. Through the years we have purchased four sets of bedding and produced the matching decor for each new bedding set.
Is she spoiled, YES. However, moving is hard and she has been strong, loving, kind, understanding, and all around resilient through the many life changes. So, if a little bedroom decor eases and distracts a bit from the challenges of moving…. well, we’re going to do it.
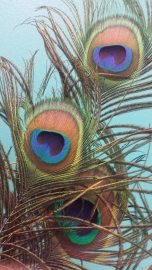
Peacock Fun!
New Room: New Look
Last Fall, it was time to choose a look for her newest room. As usual, I longed for quiet subdued colors and she wanted vibrant color. After many discussions, I decided to let her “dreams come true”(as she might say). I gave up the quiet calm tones I had in mind and embraced her choice of bright teal and, of course, peacocks.
Sure, I allow room changes but I am conscientious about keeping the costs down. We could have kept one great look for her room the last 8 years (which is also a great choice) but Shiloh loves changing things up just like her mom. As a result, we spend a little less on each room and then reuse, re-purpose, and shop sales to make updates more often.

Aqua Shine!
Chicken Coop Treasure Hunt
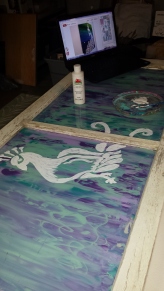
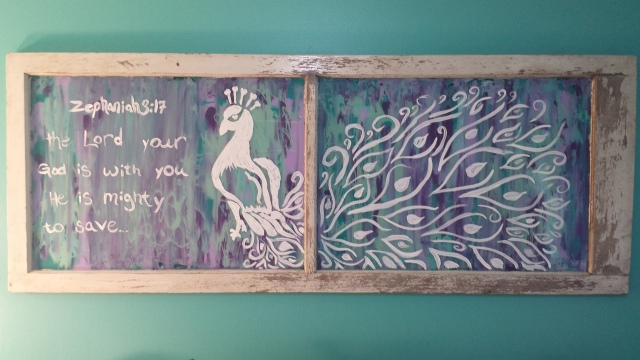
Shiloh loves making things with me, so she went digging in the chicken coop at her grandparent’s home for some potential art for her room. She found a great window which we painted together to fit the theme. It was a fun, kid-friendly project that didn’t take much time at all. See below for how to make an old window into a fun inexpensive feature for your wall!
Enjoy!
Randa
Project Time!
My Cost: Approx $10 (Spray Varnish and Acrylic Paint) I had everything else on hand, if you don’t, see below for the full list and approximate pricing.
Supplies
Free ($5-$20 Antique Store) Found Window
$10-$15 Window Cleaning Supplies (Soap, Cloth, Mineral Spirits, steel wool, razor blade)
$5 Acrylic Paint (Walmart: About $1.50 a tube)
Paper
$5 Stencil – optional (Hobby Lobby/Walmart/Online) I just painted it free hand while referencing a pic I liked.
$9 Spray Varnish
Gloves, Goggles, Mask
- Clean Window
Clean glass using soapy water or window cleaner. If residue is stuck on the glass use mineral spirits, a brush, and steel wool to scrub off the dirt.
Frame: If needed, lightly sand or wipe with damp cloth (Take necessary precaution if window is old as paint may be lead based).
*Safety first: Use gloves, mask and goggles
 Clean Window Glass
 Clean Window Glass
 - Add Paint to Window (Background Color)
Turn the window to the back side and speckle with dots of paint.


- Spread Paint!
Use a sheet of paper to gently pull paint down the window. Repeat until desired look is achieved. Let dry.


- Window Design & Paint
Choose a picture, stencil, quote, or be creative. Next stencil or paint desired image on the front of the window. Let dry.
*Shiloh picked out the picture and I painted it. She decided she was content with only doing the back side color.
**Another option is to leave the front of the window glass unpainted to be written on with whiteboard markers. I did this with a map on another window and my kids have a lot of fun marking it up.
- Mistake? Oh well!… Scrape and Try Again
The beautiful thing about painting on a window is that you can mess it up, scrape it off with a razor blade and start over till you get it right. If Shiloh ever wants something different, we can easily scrape it and redesign. - Seal Wooden Frame
Protect window glass and spray wood with spray varnish. Apply three thin coats to avoid dripping.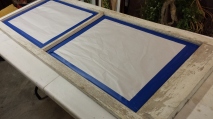
- Hang and Enjoy!
Attach hooks to hang. I put painter’s tape on the wall and marked the studs then transferred the tape onto the window for accurate, simple measuring.
 Bedroom: Finished!
 Art Wall!
 Bathroom
Here are a few other projects we completed for the room:

I sanded down a piece of wood from an old pallet and used it as a base for the coat rack hooks in Shiloh’s room.
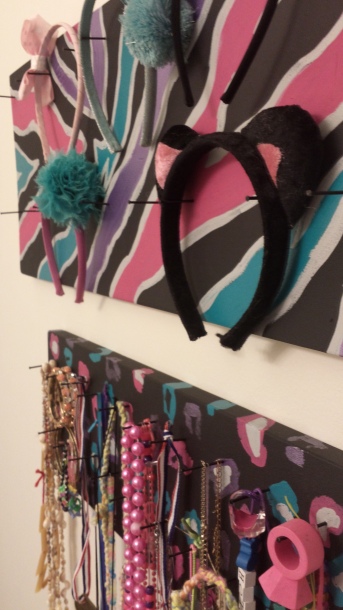
I painted a design on a couple of old boards and then added nails to make a headband board and a necklace board. Just a few drill holes in the back and it is easy to hang too. 🙂
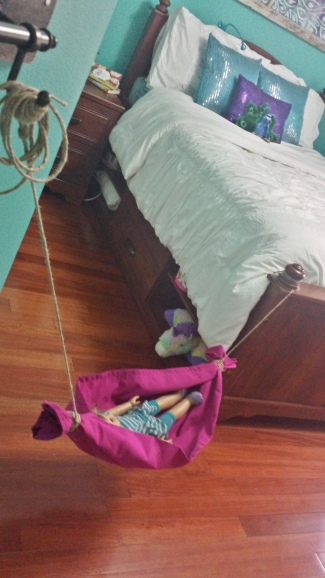
Shiloh made this hammock for her American Girl Doll (with a little help).
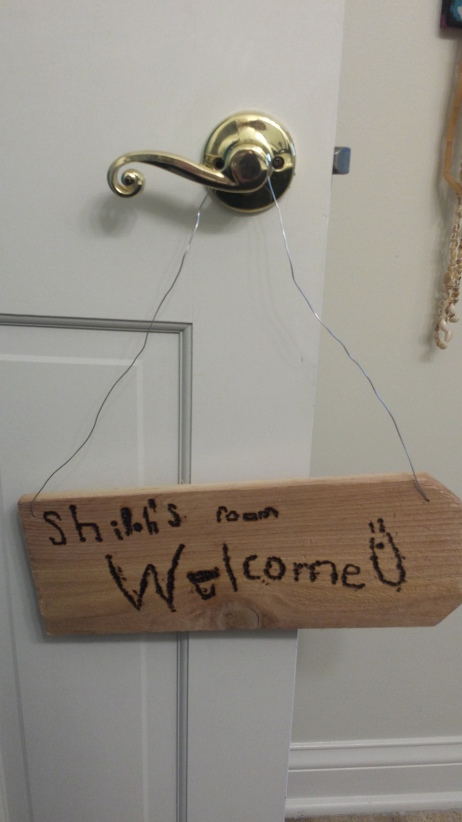
Shiloh had a lot of fun experimenting with a wood burner for this sign she made for her door. The other side says “Closed”. 🙂

Nice job mom and Shi!
LikeLiked by 1 person
🙂 Thanks Barat 🙂
LikeLike
Great job!!! Love the wall art!
LikeLiked by 1 person
Thanks Stephanie! 🙂
LikeLike