
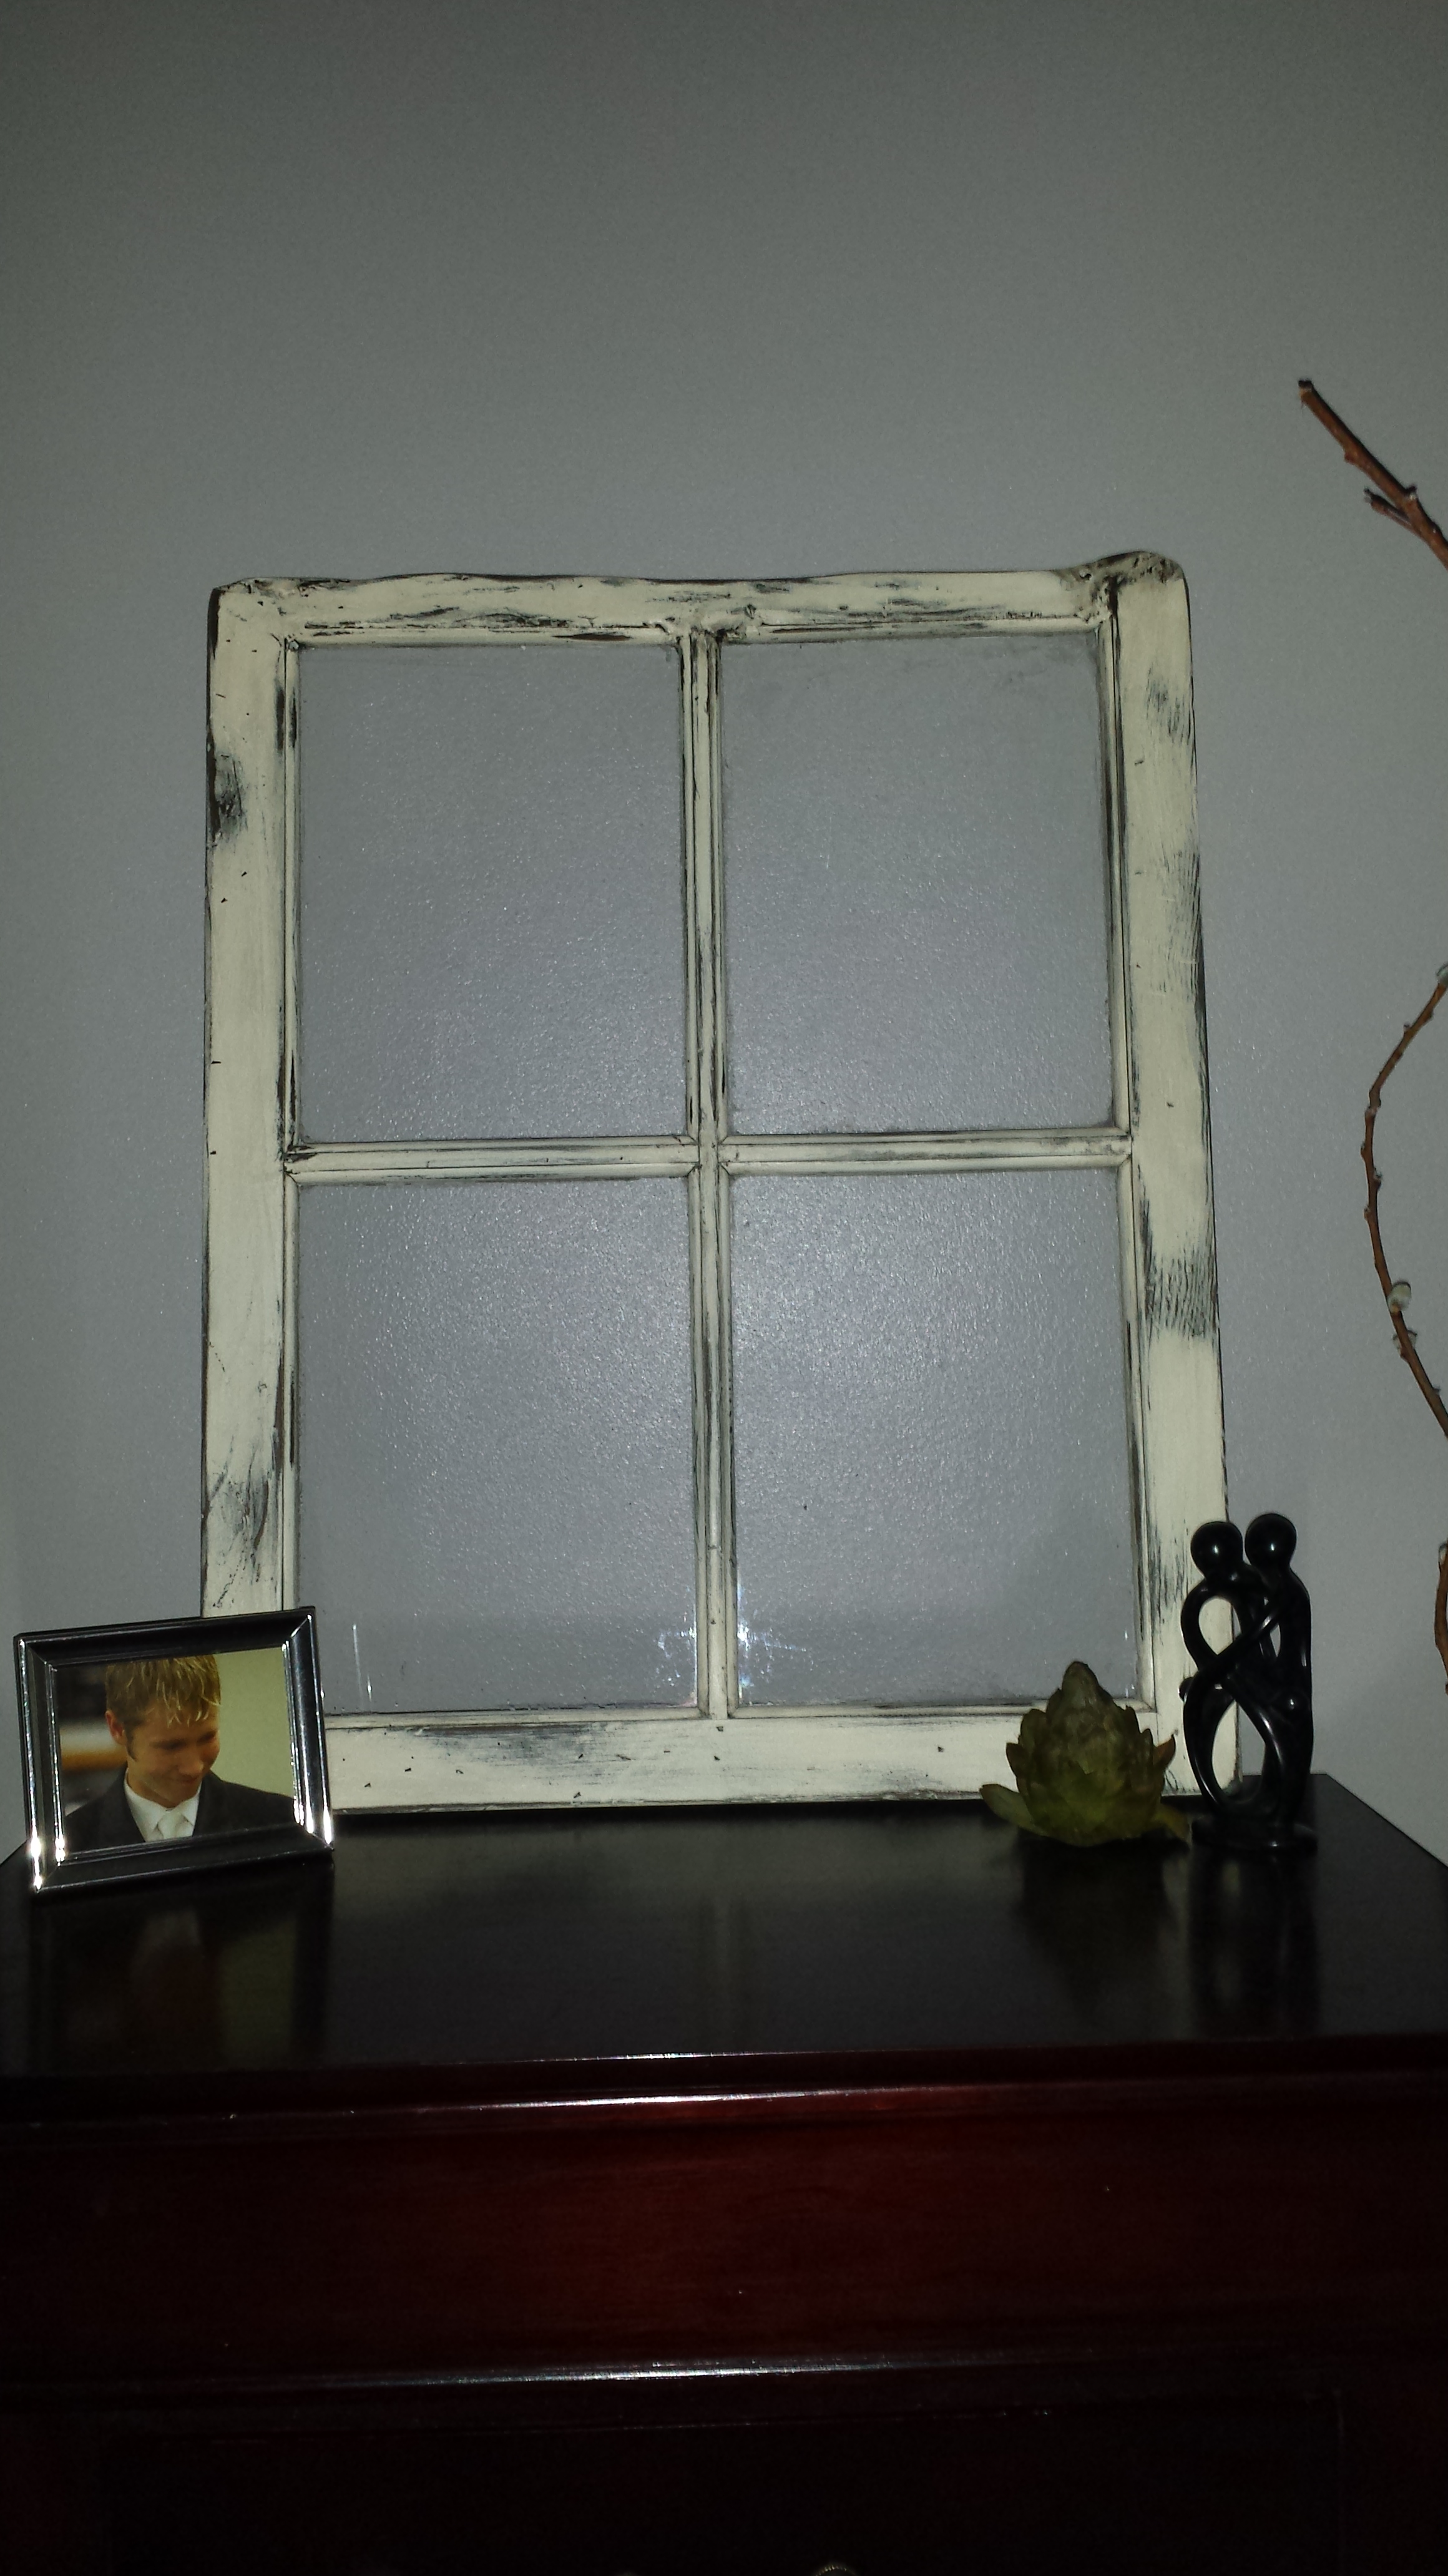
Window: Finished!
Hello World!
Welcome to my first blog post! Isn’t it thrilling? Well, contain yourself… we have things to do. I thought that I should start with one of my favorite projects of all time (a chair from the chicken coop). However, the pictures aren’t quite ready and this is as good of a place to start as any other project, so let us begin the unsaveable window project.
Enjoy!
Randa
Possible Project: Window
Question #1: Can it be saved?
Everyone who knows me well, knows I LOVE found things that need redemption. As a result, my sister Heather, brought me an old window that was growing moss and proceeded to ask if I could save it. YES! OF COURSE! Almost anything can be saved! But that is not the only question one should ask when taking on a new project, there are two more and here is the second: Is it worth it? Is it worth my time and effort to reclaim this little nugget from the grip of decomposition?

Window: Original Condition ~ Detailed View
Question #2: Is It Worth Saving?
Nature was really taking over on this particular piece and honestly, I love that… in a bubbling brook or on the rocks in my natural landscape… it’s not so great on a project I want to put on display in a home. This very window was beautiful as is and watching nature take it back had a certain charm about it. I loved the challenge of this window and yes, yes, it could be saved…. But the second question I had to come back to when considering this project: Is it worth it? The answer in this case was a resounding: NO. The rotting pieces of the frame were literally falling off. Some parts were completely gone and the intact wood on those damaged parts was so soft I could push my fingers through it. Not worth saving. So do I throw the window out? Not quite… we must first address question #3.
Question #3: Is there a story?
This free window wasn’t really worth my time or energy to save when I could pick one up for a few dollars more with all of its frame intact. But friends, I’m a sucker for a great back story. You tell me an amazing back story on a piece of, ahem, treasure, and I will move mountains to show the rest of the world the beauty I see hidden in that piece. So it was, with this window.
The Story:
Grandma Mary, my dad’s mom, was an amazing woman. Her husband died when her youngest of four children was just 2. I’m told she bravely left the farm, moved her family to town and got a job to support her clan. I remember that she worked hard, enjoyed being creative, loved Jesus and loved The Young and the Restless. I always looked forward to going to her house as I had a world of crafts forever at my fingertips and free reign to create as I pleased… and create I did. Each time I came to this house it was spilling with memories and old project “scraps” just waiting to be made into a new treasure.
This lovely, unsaveable window was a part of my grandma’s small white one-car garage which she had built shortly after moving to town. As I looked at that window, it began to transform into a picture, a memory of Grandma’s strength. She always seemed to me to be a resilient woman with a steadfast will, a survivor who had come out of a nearly impossible situation and lived to tell the tale. Many years later when Grandma and her home were very well on in years there was an unfortunate house fire that destroyed a large portion of her belongings, but there was that garage, it stood untouched. A garage her son, my father, deemed worthy of rescue, not demolition. My father moved this garage to a little piece of land out on our family farm. My grandma has since gone to be with Jesus but her garage has remained many years out among the other farm sheds. Alas, the garage has been strong and sturdy over the years and recently was revived with a face lift. The walls were reinforced and the window replaced, this original window that had reflected so many memories seemed to have lived its life. My sister rescued said window from that very garage before presenting it to me. This window definitely has a story. Now we must circle back to question #2 with our new found knowledge, my friend.

Window: Before
Question #2 (again)
There’s a story…. Is it worth saving?
After a bit of research about the window and the discovery of its origins, that window, in one blink, went from junk for the trash pile to a picture of my creative strong willed grandma. This window became somewhat of a symbol of her for me. This window that had survived a house fire and a transplant wasn’t to have its end like this… it would live on as a great reminder of my amazing survivor of a grandma.
So now with my potential window project in hand and its story discovered I must ask my question again: Is this window worth saving? Yes!
So without further ado, I shall give you a step by step guide on how to save and unsaveable window.
LET’S DO THIS!
Project: Grandma’s Window
If you have a window that you want to redo but no rotting wood to deal with, just skip ahead to the steps you need and you should be well on your way… but your story won’t be quite as good. 😉
My approximate Cost: $15.00. My only purchases included a can of primer and finishing spray paint totaling $9.15. In addition, I added a few dollars for the portion of the supplies I used from what I already had. If you need more supplies than I did, your cost may vary. See below for a full list of the supplies and hardware you will need to complete the job.
Project Supply List
$0.00 Window (Found!)
$20.00 container (approx.) Auto Body Filler, Aces: Local Hardware Store
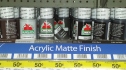
$3.68 can Primer: Rust-oleum Automobile Primer Charcoal, Wal-Mart
$5.47 can Krylon Indoor/Outdoor Satin Ivory Spray Paint, Wal-Mart
$9.49 jar Valspar Signature Colors Half Pint Antiquing Glaze, Lowes
$2.97 pack 150 Grit 3M Sand Paper, Wal-Mart (you will have plenty left)
$0.50 Paint brush/Sponge Brush 1” wide (approx.) (or borrow from the craft corner)
$3.50 Putty Knife
Old sheet, blanket, tarp, shower curtain or flattened box (to protect the ground)
Old 2x4s, small boxes, strong cups (To prop up your project)
Old Cloths or paper towels for clean-up
Tape and paper (to cover windows before painting)
Hand Sander (optional)
Gloves
Goggles
Mask
*SAFETY FIRST! Wear gloves, goggles and a mask for all tasks… Your skin, eyes and lungs need not suffer for the cause.

Window: Washed Off
1. Clean up the window frame wood
I rinsed the window and pulled off as much moss and dirt as possible without compromising the remaining wood.
*SAFETY FIRST! Don’t forget that old windows may have lead paint and if you suspect this to be an issue investigate the best way to proceed (you have a few options).
2. Let the wood dry completely
Don’t mess with the wood until it’s completely dry because if you have wood that is in poor shape it will be in even worse condition when it is wet. I know because I made this mistake. I pulled off much more wood than needed in my effort to get it cleaned up while still wet. Your welcome, I learned the lesson the hard way, now you don’t have too!

Window: Clamped After Applying Wood Glue
3. Use wood glue to secure all loose wood joints
Keep the joints secure with clamps or old belts and wipe off any excess glue while still wet. Leave tightened until dry (about 24 hours).
Be sure to protect the surface you are working on and prop up your window on old 2x4s or an old box. Continue to use the protected propped up surface for the remainder of the project.
*Less is more with the wood glue. The bottle says it can be sanded and it can, but it’s ridiculously difficult, if not impossible to hand sand all those little nooks and crannies in corners and creases after the glue has dried.

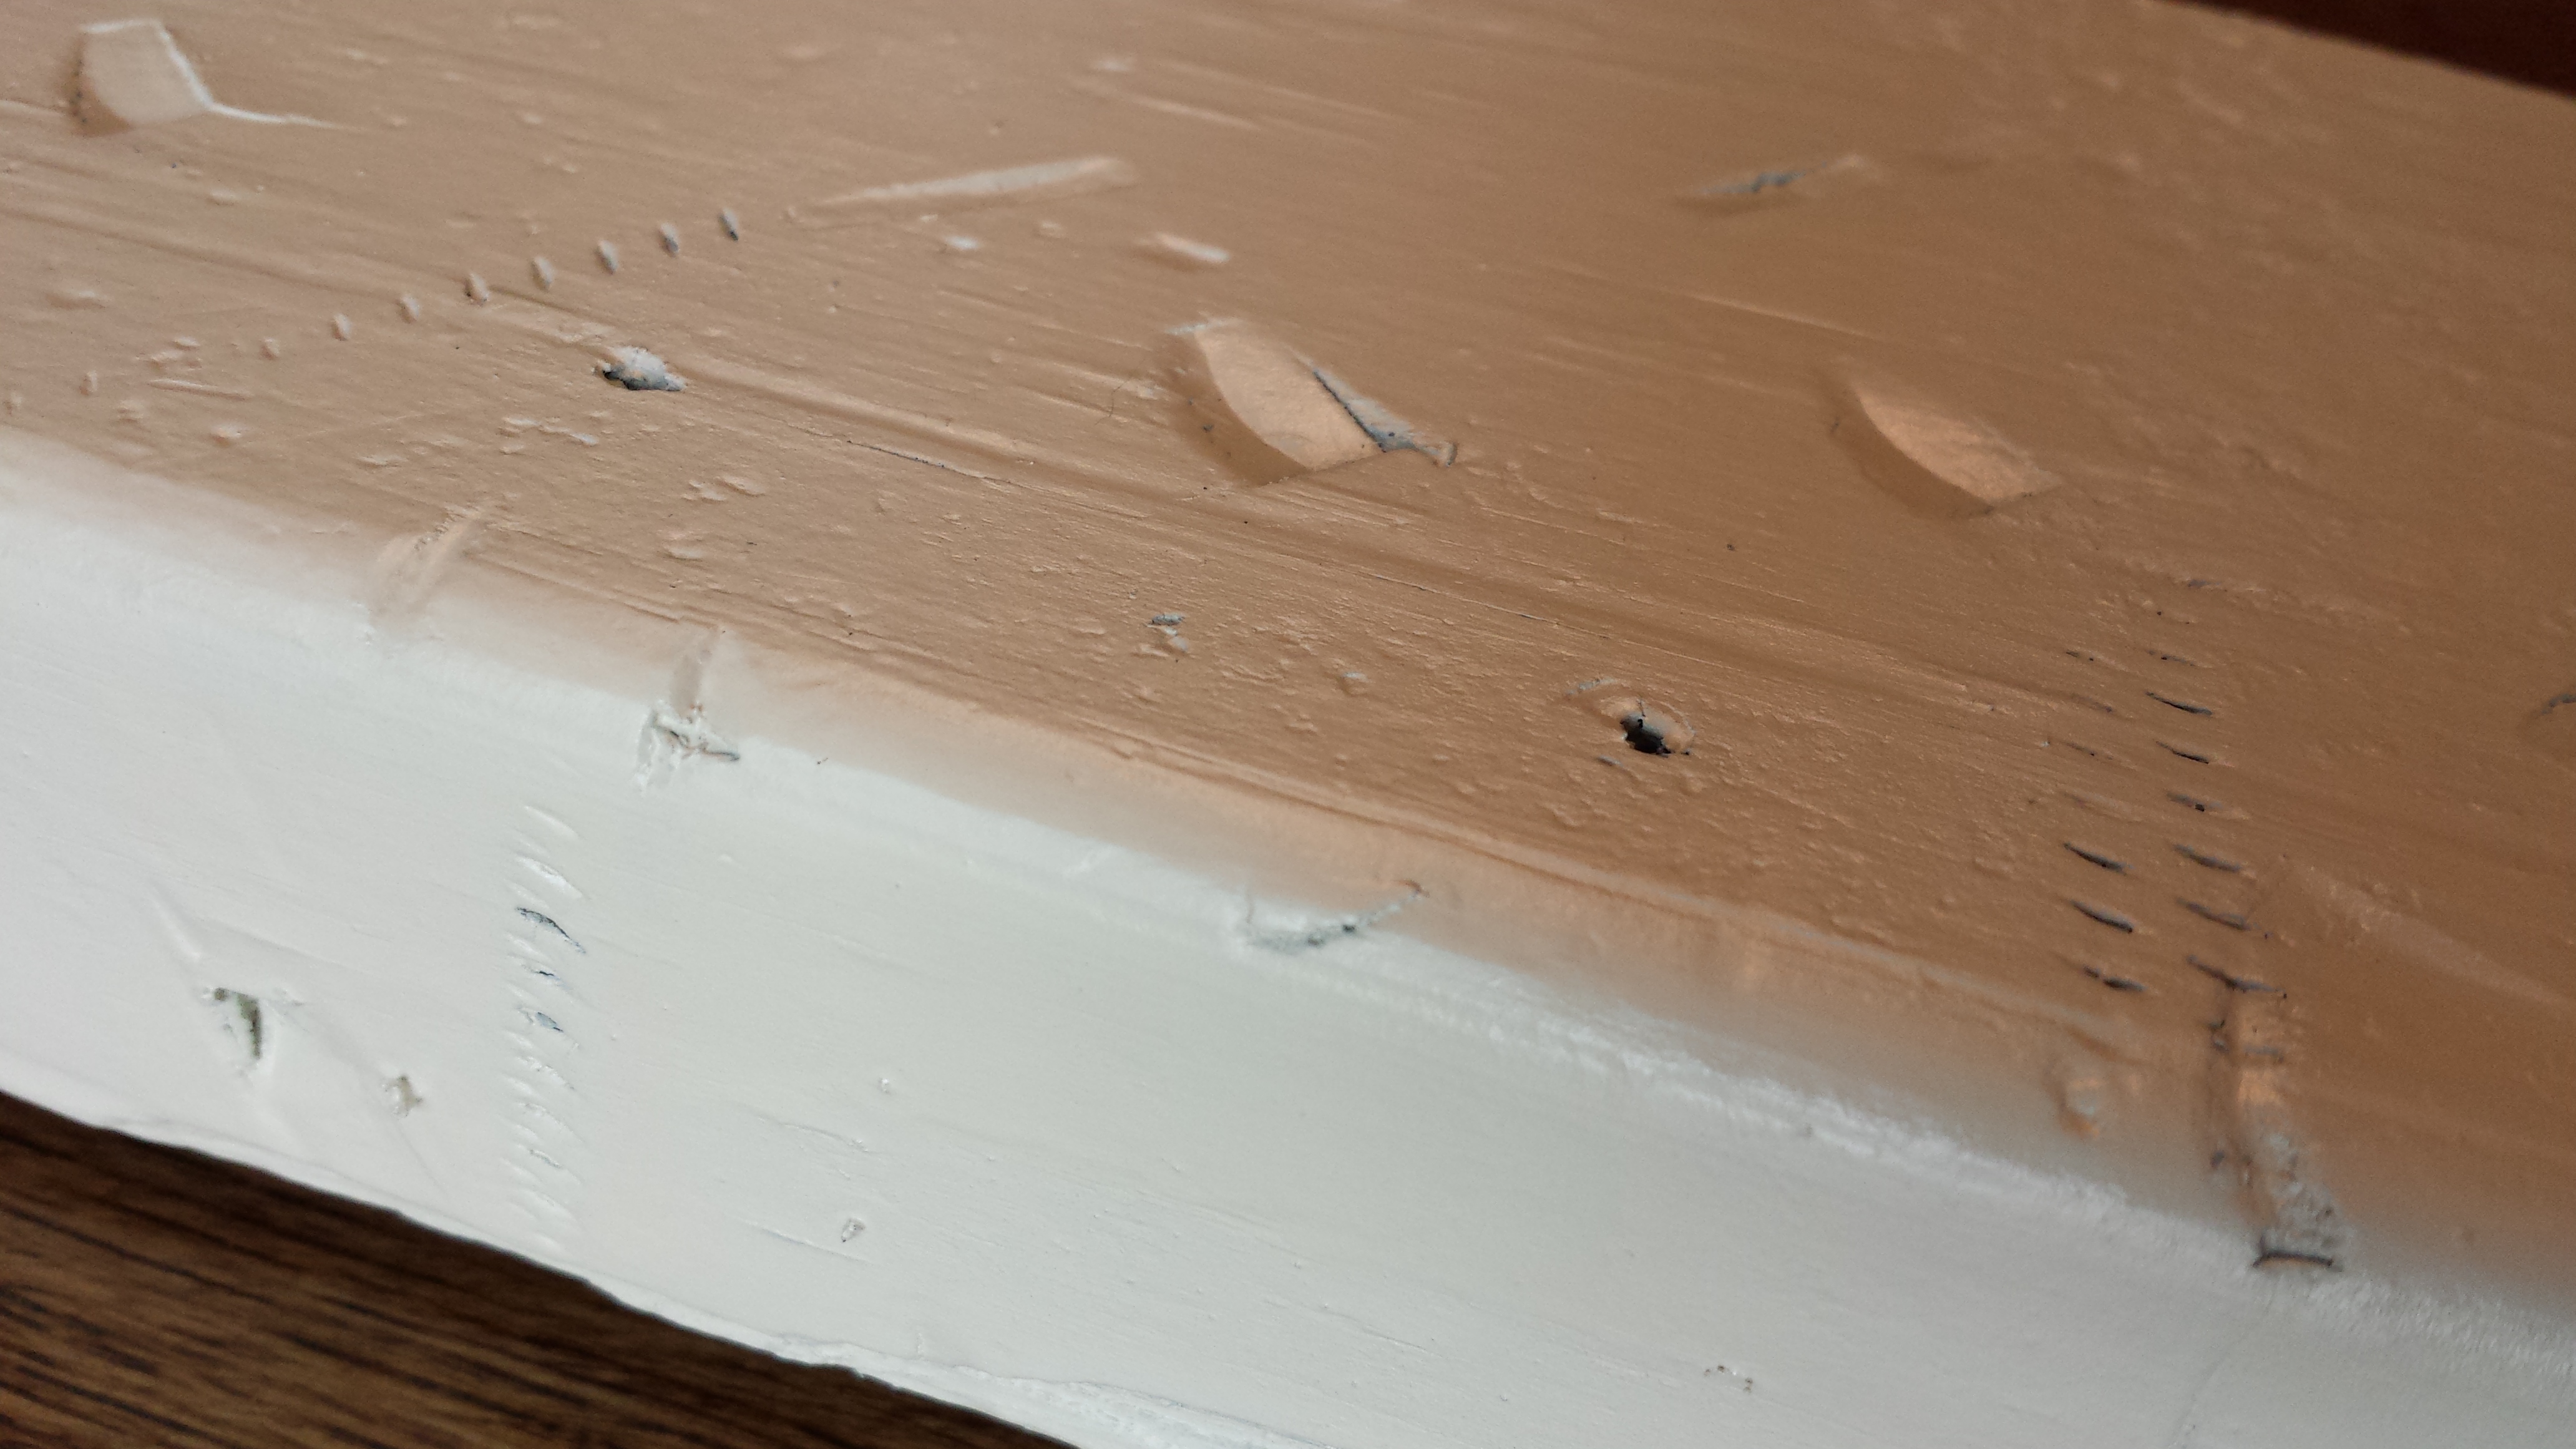
Body Filler (Auto)

Body Filler Putty: Dried
4. Use Auto Body Filler to reform missing window frame
Be sure to check cracks and holes in the wood for loose wood debris one more time before filling them. Make auto putty (you will have about 5 to 10 minutes before it dries). Use putty to reform the window in the places that are missing wood. Get it as smooth as possible. It may take a few rounds because of the quick dry time.

Body Filler Putty (Sanded)
*Wood putty works also but it takes a few days and many rounds of applications. Repairing damaged window frame with actual wood is also a great option if you have the skill and tools. As I had neither the patience for wood putty nor the skill and tools to create a new piece of wood, I went with the option above. I didn’t want to invest that much time repairing since I knew the finished product would still turn out great.

Sand Paper
5. Sand Body Filler
Use sand paper or an electric hand sander to smooth the putty out. I knew it wouldn’t be perfect so I just kept in mind what naturally distressed wood might look like as I smoothed it off.

Distressed Window Frame
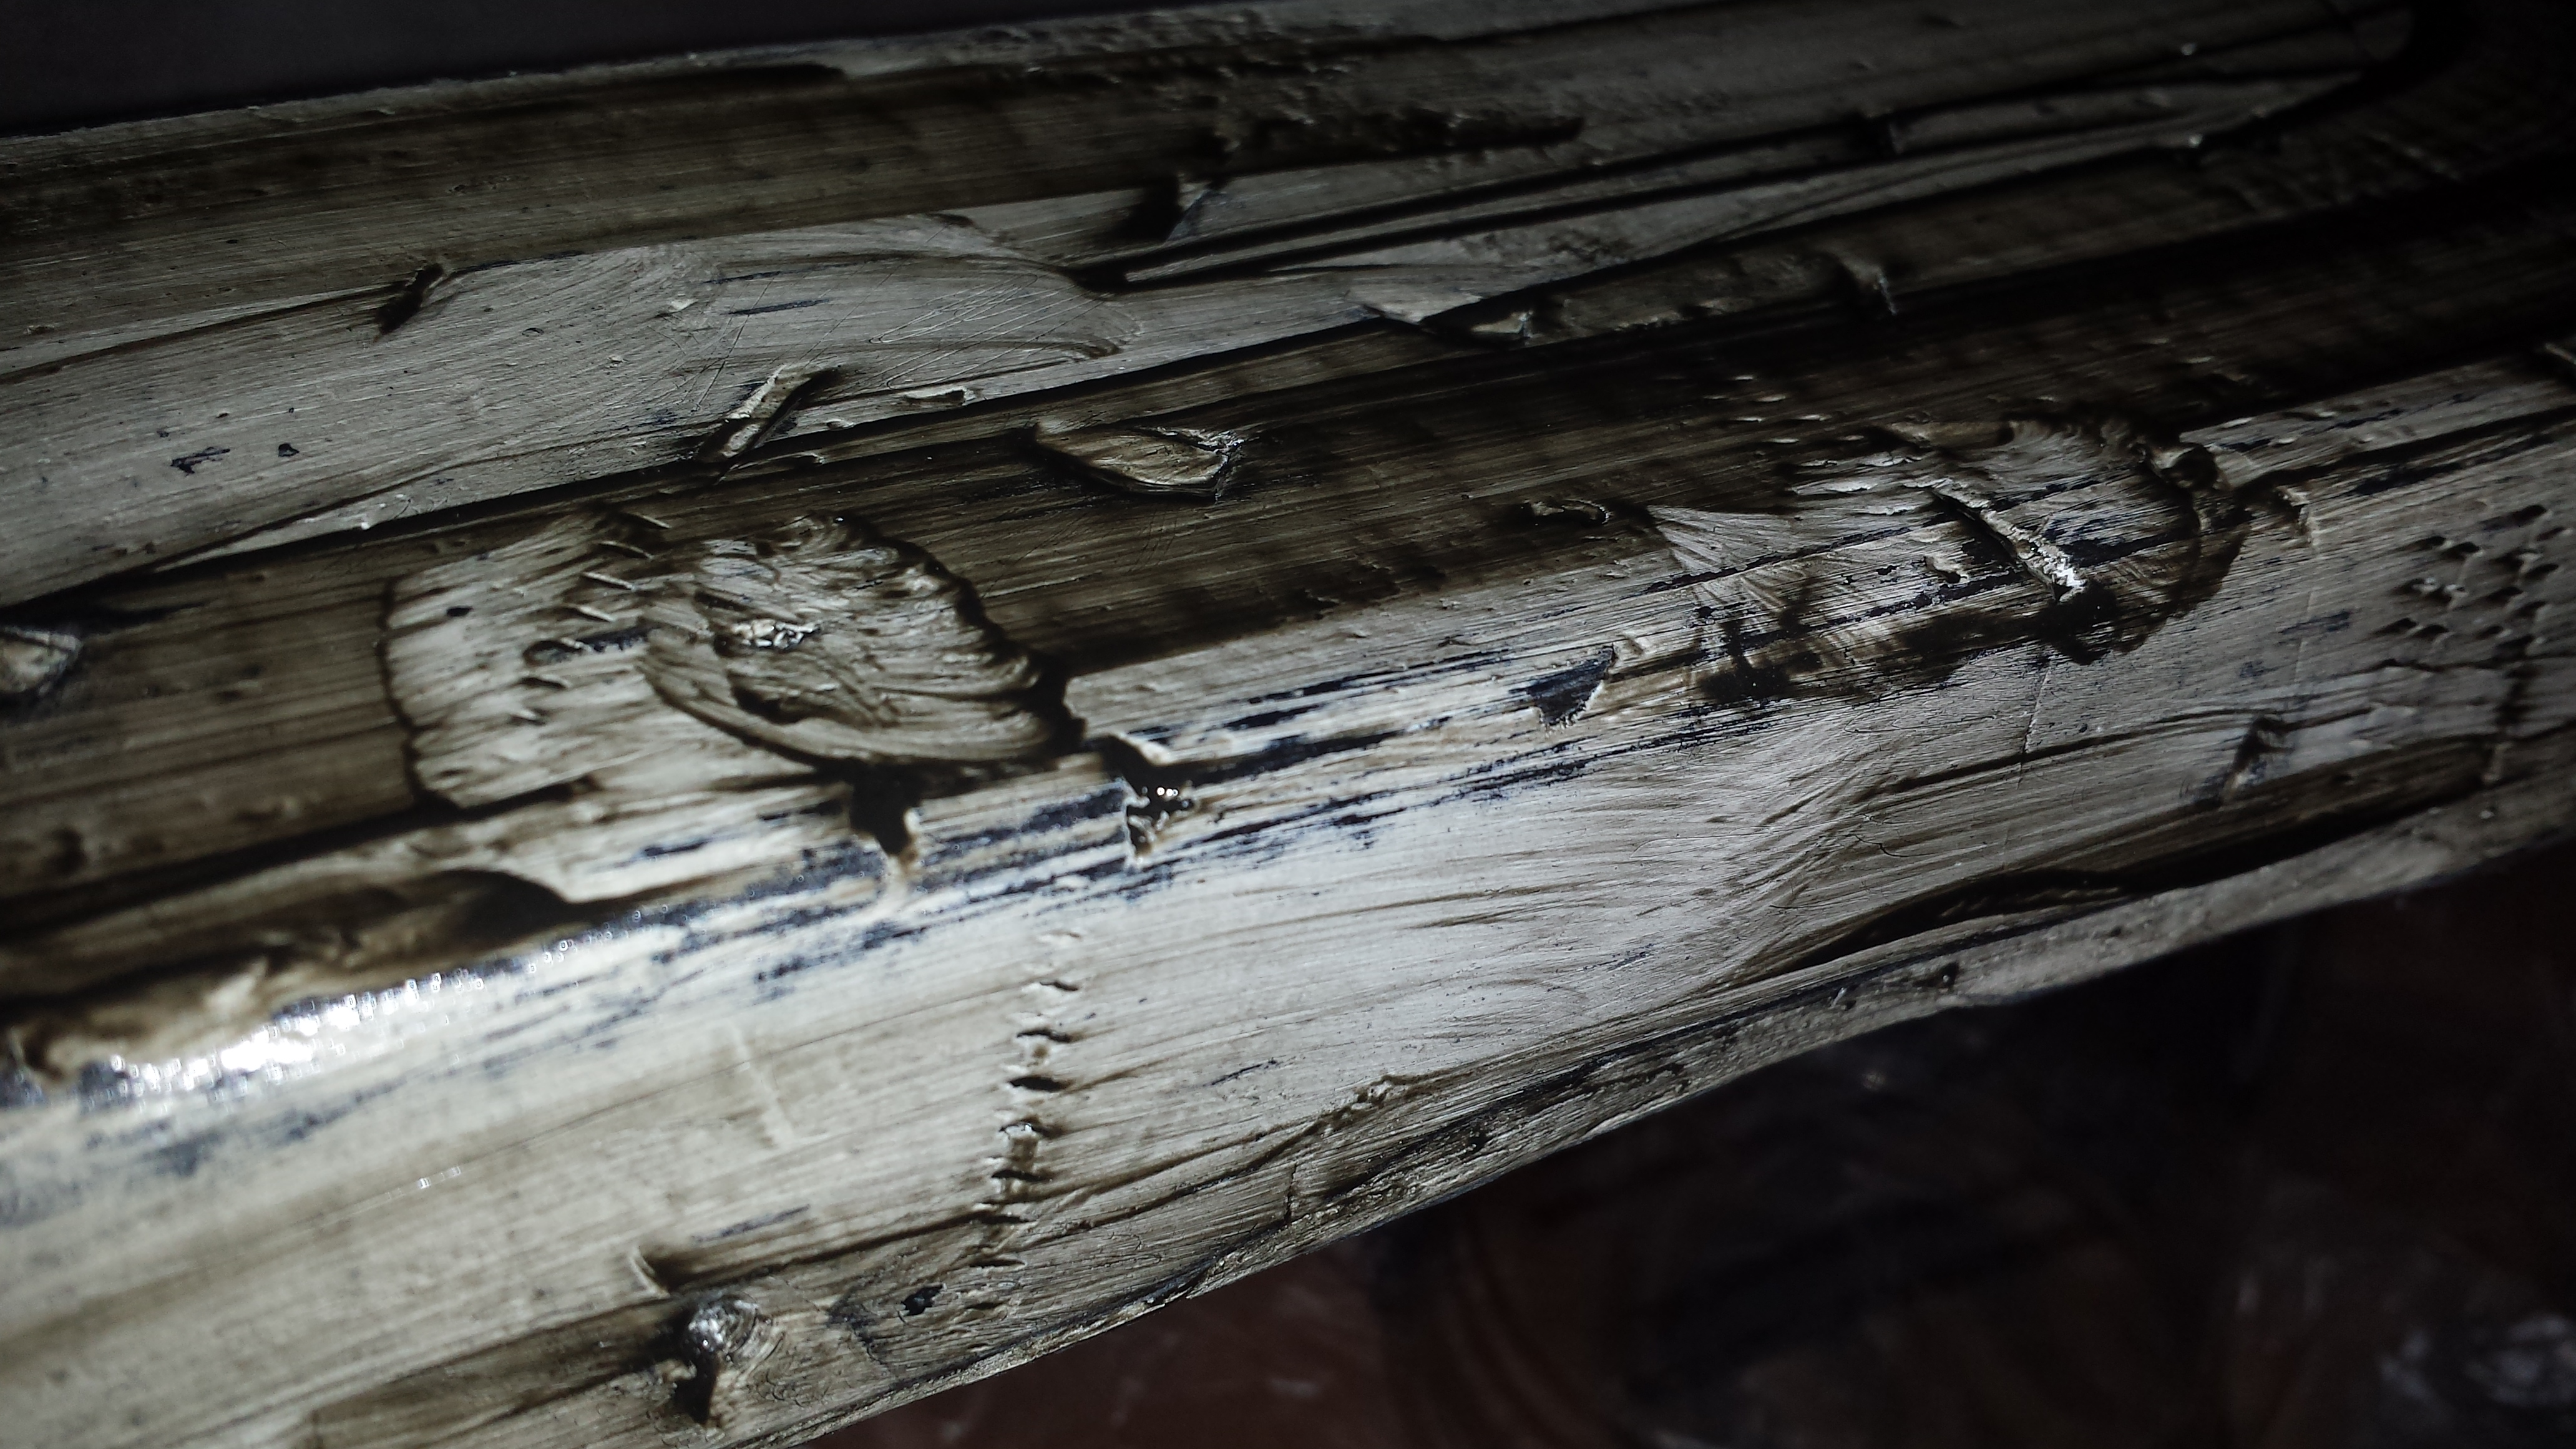
6. “Distress” remaining frame sides
This particular window had wood in near perfect condition on 3 sides but the 4th was nearly gone. As a result, even after it was repaired, the 4th side looked out of place in relation to the rest of the piece. This means it was time to distress it, “Distress” is a fancy way to say that I took various shop tools to beat and scratch up the rest of the wood sides. Yes, it’s as fun as it sounds. I used an array of screws, nails and other oddly shaped metal tools to gently rough up the wood. Then I used my automatic hand sander (hand sanding works also!) to smooth the crisp edges of wood.
Acrylic Paint for Priming

Window Prepped for Paint
7. Prepare for painting
Dust off wood, tape off windows and spot prime repaired areas.
Dust off Wood: Be sure to blow or dust off all the remaining residue from distressing. I like to use a large paint brush to dust and sometimes I even use my leaf blower to give it an extra push towards cleanliness. If I was going for a really fine, smooth finish I would advise using tack cloth to really clean up the wood but we’re going for rustic here so let’s not waste time and money on tack cloth.
Tape off all the windows before painting. It saves a lot of clean up time later.
Spot Prime over body fill putty after sanding. Any non-washable paint would work great.

Spray Paint: Primer

Window: Primed
8. FINALLY! Paint… the base color
I love charcoal colored paint and I love it as a base over lighter colors because when distressed, the charcoal is exposed and adds much depth to the project. It often takes an extra coat or two on the finish as a result of the dark primer but it is well worth it!
Don’t forget, you should be working on an old cloth, shower curtain or tarp to protect the floor and prop up the window on 2x4s or an old box. I spray painted 2 coats of charcoal as the base color for this project. I waited a minimum of 30 minutes between coats. Check the can and temperature for ideal dry time.
Whenever I spray paint I ALWAYS assume it will take a minimum of 2 to 3 coats. It is always better to do 3 or more thin coats of paint than try to get it done in less and end up with runs. In the end it will take much longer to fix runs or have a less than awesome finished product because of hurrying through the painting process. I only did 2 coats this round because it is the primer and not the finish.
Painted Wood
9. Paint the finish color
I used spray paint for the finish on this project. First I used a dry cloth to wipe residue from the charcoal spray paint and then started my 3 coats on the finish. Again, I waited a minimum of 30 minutes between coats (check can and temperatures for dry time). Spray Paint worked because there is such a small amount of surface area and I knew I would be distressing and antiquing the surface afterward. On bigger projects with more wood surface or less distressing I would recommend painting by hand or with a professional grade sprayer. The finish will be much more professional looking. In this case it won’t matter so a simple spray can will work great.

Sanded Wood
10. Sand and Sand AGAIN!
Sand corners, edges, divots and dents somewhat aggressively by hand or with a hand sander to help them look like a character trait and not a blemish. Then lightly sand all the surfaces with somewhere between 150-220 grade sandpaper to give a consistent finish.
If some parts are sanded vigorously and others not sanded at all it doesn’t look very realistic as the paint in some places will be very worn and look brand new in other locations.
When you are finished the wood and the charcoal will show through in several places. Be very gentle and strategic about sanding over the damaged area so as not to expose the putty. If you expose the putty it can be fixed in a later step so don’t stress out over it.
11. Clean up the wood again
Use a brush, rag or leaf blower to remove excess residue from sanding.

Painting on Antiquing Glaze
12. Antique the wood frame with Antiquing Glaze
Antiquing Glaze: I’m obsessed with this product! I love it so much. Simply paint it onto the surface for a few minutes (length depends on how dark you want it). Then wipe off with an old rag. It should stay in the cracks and dents you work so hard to make.
Antiquing Glaze On Wood
If the glaze isn’t staying on like you want it to or showing streaks (both happen often), just work with the glaze and cloth by dabbing and rubbing till the finish looks natural.

Wipe Off Excess Antiquing Glaze
Too Light? If the glaze isn’t as dark as you expected then repeat the process to darken wood.
Too Dark? If the glaze is too dark add some water on the cloth and gently rub the wood to wipe off some of the antiquing glaze. Be sure to do this right after while the antiquing glaze is still wet.

Wood after Being Antiqued with Glaze
*If you sanded too far down and exposed the putty, this is your chance to cheat and leave the glaze a bit thick over the areas it shows. You could also find a bit of charcoal paint and just use a brush to fix it.
**You do have the option to spray a few coats of spray varnish to protect the finish. I chose not to but both look great. If I varnished a project like this I would prefer to spray 2-3 coats of satin finish varnish as it would be much faster than with a brush and be a nice finish for this sort of project. In addition, the satin keeps the window from being too shiny.
13. Let dry and clean window glass
Let it dry really well and remove paper and tape. The paint may be dry to the touch but not fully cure for several days so be gentle when working with it.
Clean the window panes with a razor blade or Norwex Window Cloth if needed. I love Norwex… and sell it. 😉

Window Finished: Repaired Portion Displayed On Top
14. Hang your window and enjoy!
Because of the extensive damage to the side of the window I felt that it would look best on top to help balance the look on the wall. You can add hardware and hang or prop it up against the wall.
My Grandma’s window is saved for a few more years. Any other window would have been tossed aside and replaced with one in better shape as it would have used less time and resources to fix up but this window had sentimental value to me. I brought it to my sister for Christmas and she is enjoying it in her home now. If she stops enjoying it… I will take it back because it was a lot of work. Ha!
Window Finished!
Good luck saving your own family heirlooms!

Great job Randa!!!! Welcome to the world of blogging!
LikeLike
Thanks Stephanie! A lot goes in behind the scenes that I didn’t know about but it has been a fun adventure so far. 🙂
LikeLike
Love this and the sweet story behind it. Can’t wait to see what other fun projects you share with us! We miss you here in Southeast Kansas!
LikeLike
Thanks Jessi! I miss you guys too… I’m just getting a little less weepy about it. You wonderful people had quite an effect on me. 🙂
LikeLike
Great information. I am so happy you are sharing your talents and teaching others how to redo a window.
LikeLike
Thanks Heather! 🙂 Glad you provided the window for me!
LikeLike